I got a new set of Madcatz cymbals for my Rock Band 2 kit to replace the ones I'd had for around 9 months that were starting to get pretty beat up. When I set them up I was crushed to discover that 2 out of the 3 cymbals were a LOT noisier than any of the three I had before (even in their beat-to-hell state).
I tightened all the screws, I fiddled with the supports, I ranted and raged, I considered sending them back.
What causes the annoying buzz when you strike one of these things and how can you fix it, preferably without voiding the warranty?
Stay tuned: I have an answer I wrote up two years ago when I actually had and fixed this problem, but I only posted it on a now-deserted private forum. With the advent of gaming.stackexchange this seems like the perfect place to post my solution for posterity…
Best Answer
My wife pointed me at some high loft quilt batting she had lying around from another project, and suggested I try muffling the noise with that. Apparently high loft means "thick", BTW. Anyway, after I muffled the two noisy cymbals they were so quiet I had to muffle the third because it seemed noisy by comparison. Now they're almost as quiet as my drums, and my drums have Rock Band Drum Silencers on them.
Note that you won't need anywhere near a full bag of batting. You're best off finding a scrap somewhere or swiping some off your mom or grandma or someone who makes quilts.
Anyway, here's what I discovered by repeatedly tearing my new cymbals apart and putting them back together again.
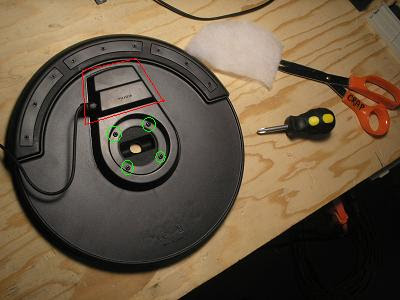
Well, there's yer problem!
The cymbal has three main pieces: the main plastic plate, the plastic housing for the electronics, and the protective rubber cover (which we won't need to worry about here). The housing is held to the plate by four screws (circled in green), but that leaves half the housing (outlined in red) just pressed against the plate, not directly attached. When you smack the cymbal (right on top of that end of the housing, typically) the housing can vibrate, and it rattles against the plate with an unpleasant buzz. If you have a set of the Rock band 3 cymbals, I believe they fixed this problem by adding two more screws through this part of the housing.
So to fix the noise, I put something soft between the hard plastic housing and the hard plastic plate. All I needed was some batting, a pair of scissors, and a Phillips screwdriver. First I cut a piece of batting roughly the size of the problem part of the housing.
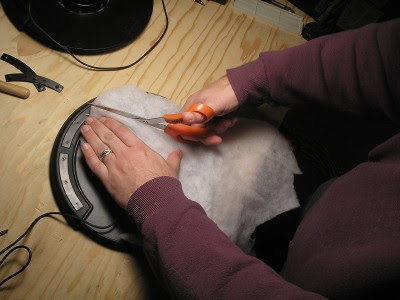
I'm only allowed to use the "CRAP" scissors so I can't hurt myself.
It's better to make the piece bigger than needed to ensure it's not too small. You can trim it up later.
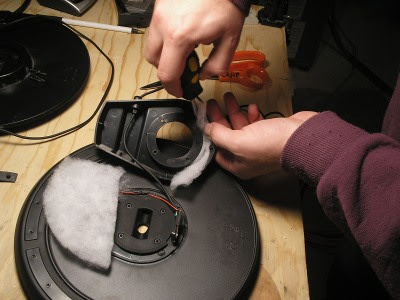
Then I had to remove the four screws and remove the housing:

Open the doors, and there's... well, not much, really.
It's very helpful as you remove the housing to gather the external wire in one hand and move it with the side of the housing it's attached to. The wire is actually quite a bit thicker and heavier than some of the lightweight components and can knock them around if you drag it across the innards. Keep it off to the side out of your way.
Then I just laid my piece of batting across the problem area of the cymbal housing. There are grooves in the plate where the housing fits - you want to cover out to those grooves. Note in the picture above that the hit sensor is attached to the main plate and covered with a stiff piece of plastic. This modification does not void the warranty on the cymbals - the warranty is only voided if you remove the screws on the sensor cover, which we're not doing. Adding batting like this will not affect the sensitivity of the cymbal in any way since the padding is between the sensor cover and the housing. I've FCed numerous songs with these modded cymbals since these pictures were taken - they don't drop notes.
Get in there, you fluffy piece of crap.
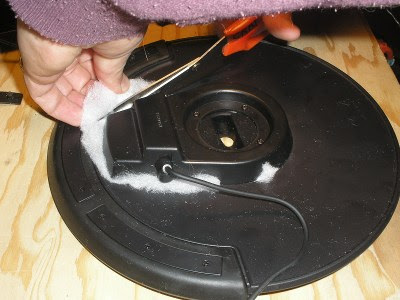
I also cut another small strip of batting and stuffed the rear part of the housing. This was probably an unnecessary step, but I mention it here to explain the little tuft of white you'll see sticking out of that area in the final picture. This step is completely optional.
Flip the housing back over into place (again, move the external cable with it to avoid frustration and fumbling).

Close her up
Replace the four screws. NOTE: I highly recommend starting each screw using just your fingers. These are metal screws going into plastic and starting them with a screwdriver can easily dig new threads into the plastic shell, weakening the grip, instead of using the existing threads. Fiddle them in with your fingers until they go in easily, then use your screwdriver. Ideally you should feel almost no resistance to the screwdriver.
Trim up any excess batting (don't go too crazy, we don't want it to slip out from under the housing lip).
Snip snip
Finally, reattach to your RB2 kit and marvel at the quiet dull thud sound they make now instead of the loud rattle.